
All JAGER PRO® M.I.N.E.® cameras have an internal transmitter. *Note: the max distance from gate to camera is 50 meters before you have problems and yes, one camera can operate multiple gates.
Continue down until you see your specific control box receiver.
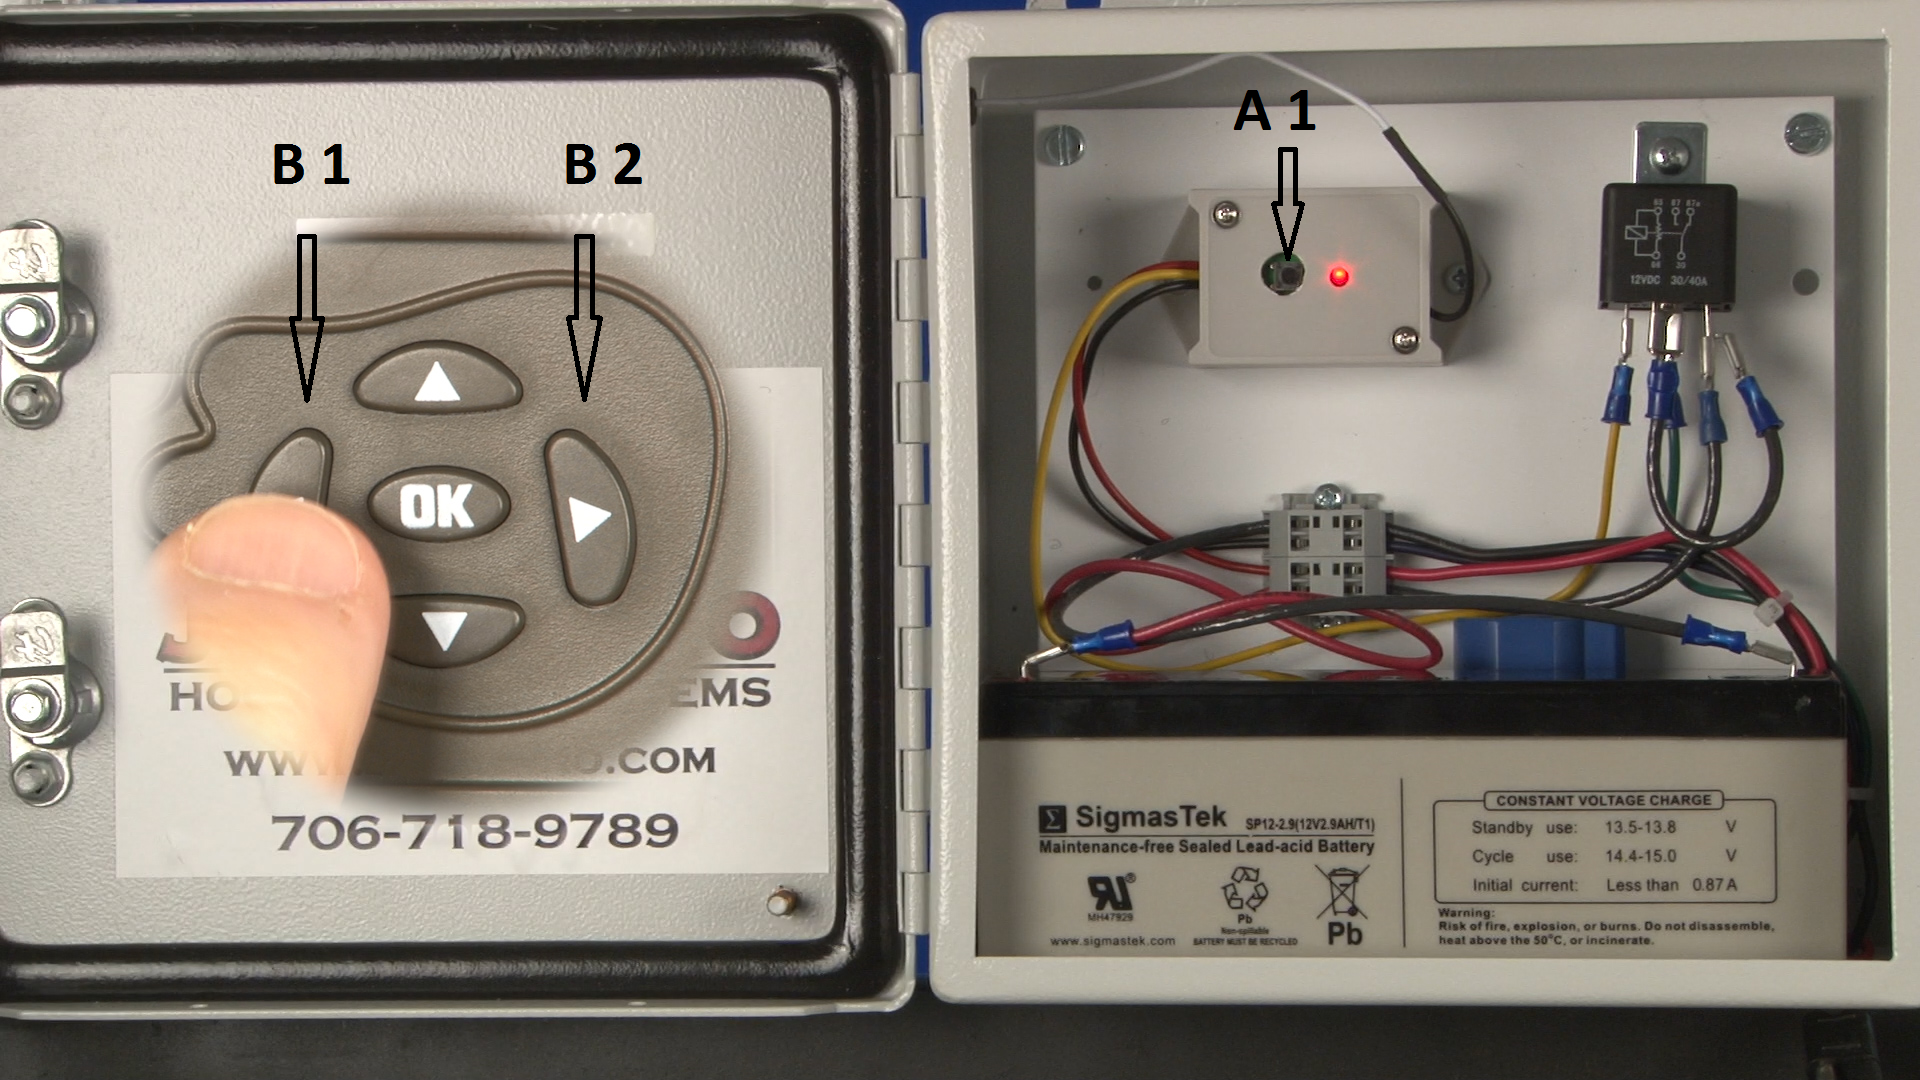
Old control box receiver.
- Move camera selector switch from OFF to SETUP.
- Open control box housing and press the receiver pair to transmitter (A1) button. The receiver red light will only emit for 10 to 15 seconds.
- Press the camera “left arrow” (B1) and release then press the camera “right arrow” (B2) and release to send a manual RF signal to the control box (You will see RF Trigger in the bottom of the screen). The receiver light should flash three times and shut off if performed correctly.
- Ensure M.I.N.E.® Camera and receiver are paired. Press and release camera “left arrow” (B1) then press and release camera “right arrow” (B2) button while observing the red light illuminate. Test successful.
New control box receiver.

- Press and release “frequency select” button (C) and red light (B) will flash either three times or five times. Press and release “frequency select” button (C) until red light (B) only flashes three times.
- Move camera selector switch from OFF to Setup.
- Press and release “pair to transmitter” button (A) and red light (B) will illuminate for 15 seconds. Users only have 15 seconds to complete step 4 once step 3 has been initiated.
- Press and release camera “left arrow” (B1) then press and release camera “right arrow” (B2) to send a manual RF signal to control box receiver. “RF Trigger” will appear at bottom of camera screen. Red receiver light (B) should flash five times then no longer illuminate.
- Ensure M.I.N.E.® Camera and receiver are paired. Press and release camera “left arrow” (B1) then press and release camera “right arrow” (B2) button while observing green light (D) illuminate. Test successful.
(THIS STEP IS ONLY A FUNCTION OF THE M.I.N.E.®, LIVE STREAM CAMERAS.)
The Live Stream Camera has an internal transmitter on the circuit board and must be located within 50 yards of the M.I.N.E.® Gate to operate correctly. Users must manually pair or sync camera transmitter signal to each control box receiver the first time they are linked together. It is not necessary to pair or sync camera transmitter to receiver more than one time. Pressing and holding the Pair to Transmit button for 8 seconds will clear out the memory.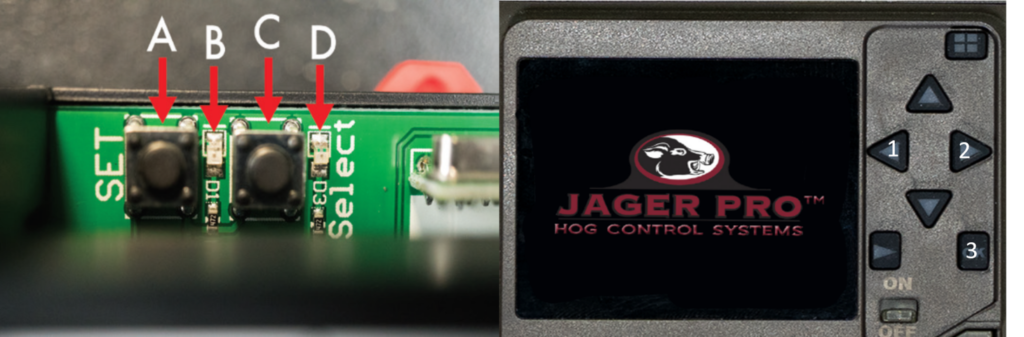
Pairing Steps:
- Press and release “frequency select” button (C) and red light (B) will flash either three times or five times. Press and release “frequency select” button (C) until red light (B) only flashes three times.
- Move camera selector switch from OFF to On.
- Press and release “pair to transmit” button (A) and red light (B) will illuminate for 15 seconds. Users only have 15 seconds to complete step 4 once step 3 has been initiated.
- Press and release camera “left arrow” (1) then press and release camera “right arrow” (2) to open the Radio Frequency (RF) page. A message will appear “Please press OK to trigger RF”. Press OK (3) and you will receive a message “RF Trigger…”, your camera should now be linked to the gate transmitter. Red receiver light (B) should flash five times then no longer illuminate.
- Ensure M.I.N.E.® Camera and receiver are paired. Press the OK (3) button while observing green light (D) illuminates. Test successful. Press menu to exit the RF page.
Repeat these steps on other control box receivers if multiple gates are used at the trap enclosure. Move camera selector switch from SETUP to ON and send the close gate command using your mobile app to test transmitter and receiver calibration and gate operation.
To time or re-sync your onsite remote. Our new receivers need to be on frequency channel 5 to pair. In the control box, press and release the pair to transmitter button, the red light will come on. Press and hold the transmitter button for 2 seconds then release, the light will come on, simultaneously, the red light inside the control box will blink and go out. Conduct a test by pressing the button again, the latch will activate. If it does not work the first time, try again.
Last Update: 01.29.2024